

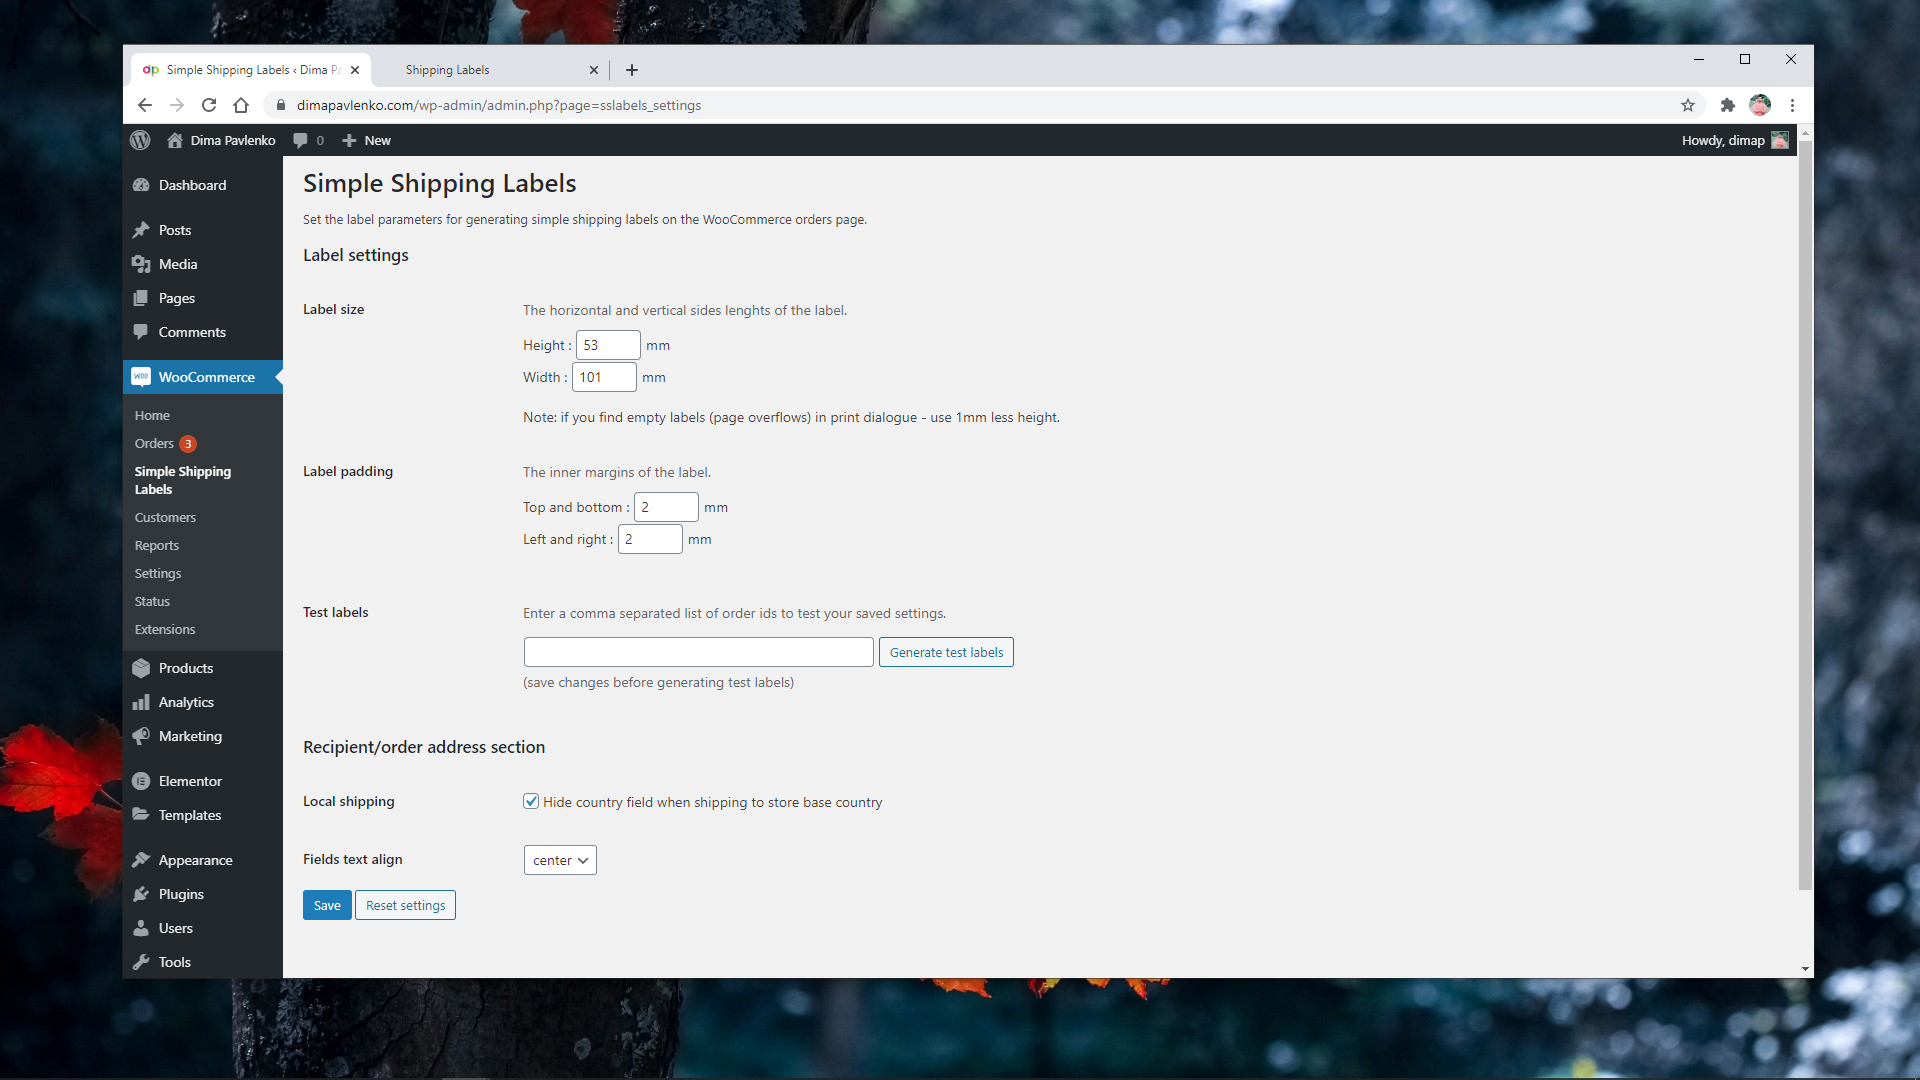

A WordPress extension plugin for WooCommerce.
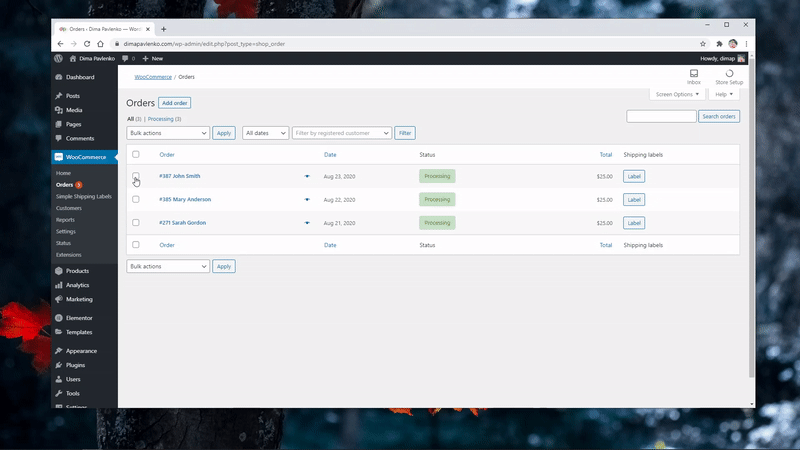
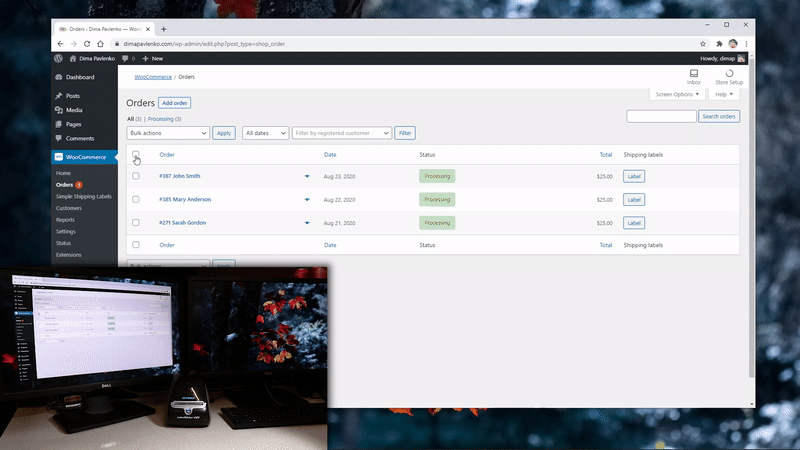
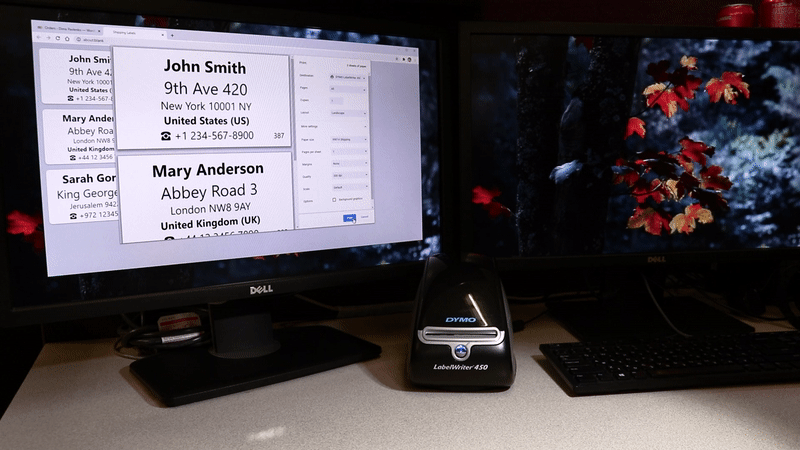
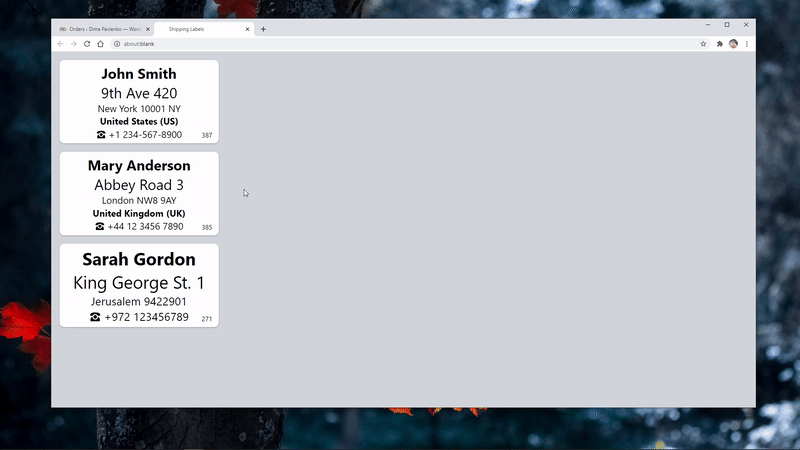
Generate an HTML page of shipping labels (for single or multiple selected orders) and print on any continuous feed label printer.
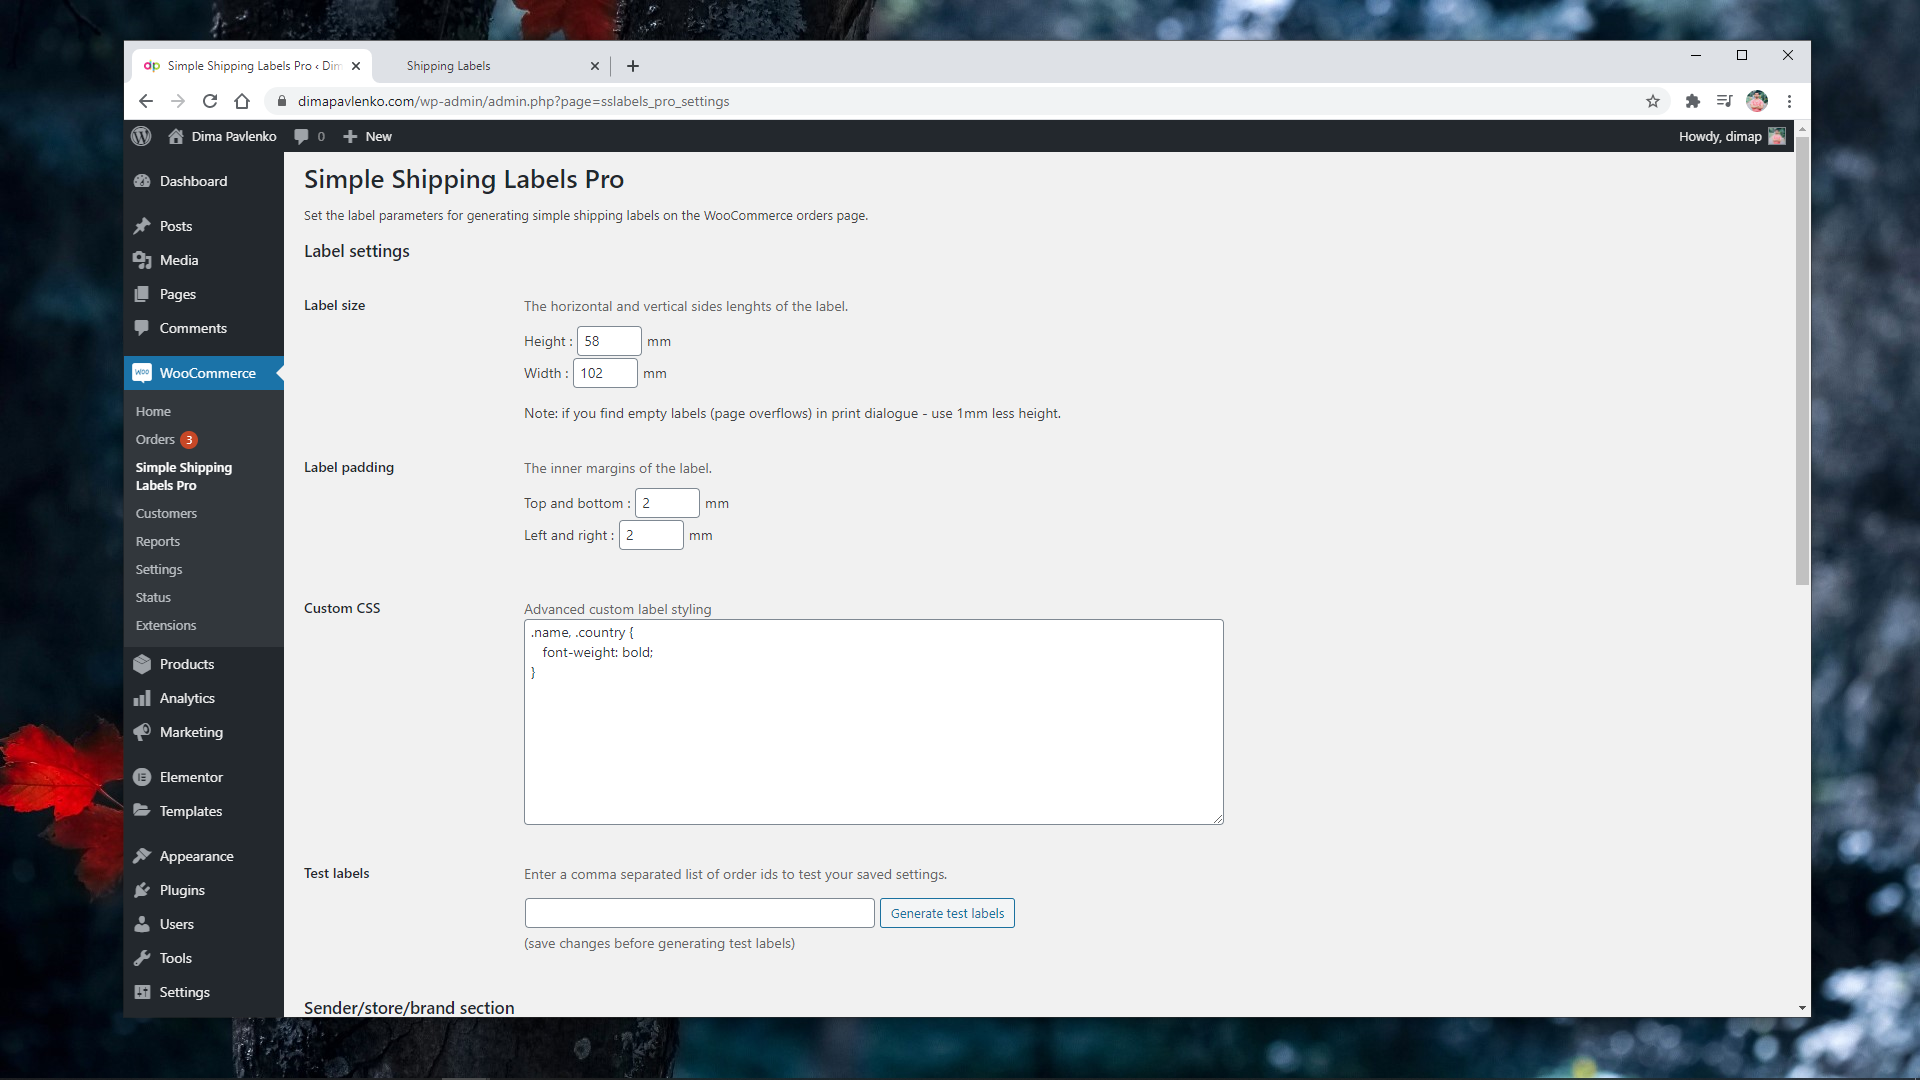
The Pro version adds a custom section above the shipping address (for store return address or branding) and custom CSS settings field for custom label styling.
Read more about the plugin at WPGlob.com:
Best WooCommerce Shipping Plugins 2023
IMPORTANT: Check reviews of each printer before buying!!!
Newer label printers (such as Dymo LabelWriter 550, etc.) require purchasing genuine label rolls, with built-in RFID tag. Similar to how inkjet printers companies enforce buying their overpriced ink cartridges.
Great wisdoms from reviews:
Whether you run a small home business or a medium retail store – providing budget shipping is the best way to draw new clients and maintain loyal customers. Use your local post office services to provide budget shipping option, while instantly printing professional “carrier”-like elegant and branded shipping labels.
Thermal label printers behave the same way as regular desktop ink/laser printers, since the labels are just “tiny pages”.
These printers can be used to print directly from PowerPoint / Word / Excel / Browser, print black & white images (or dual color red & black labels with special printers and dedicated thermal labels). Think outside the box and you’ll find dozens of awesome uses for any label printer: price tags / sale tags / barcodes / name tags for events / QR codes / gear and box labeling . . . and many more.

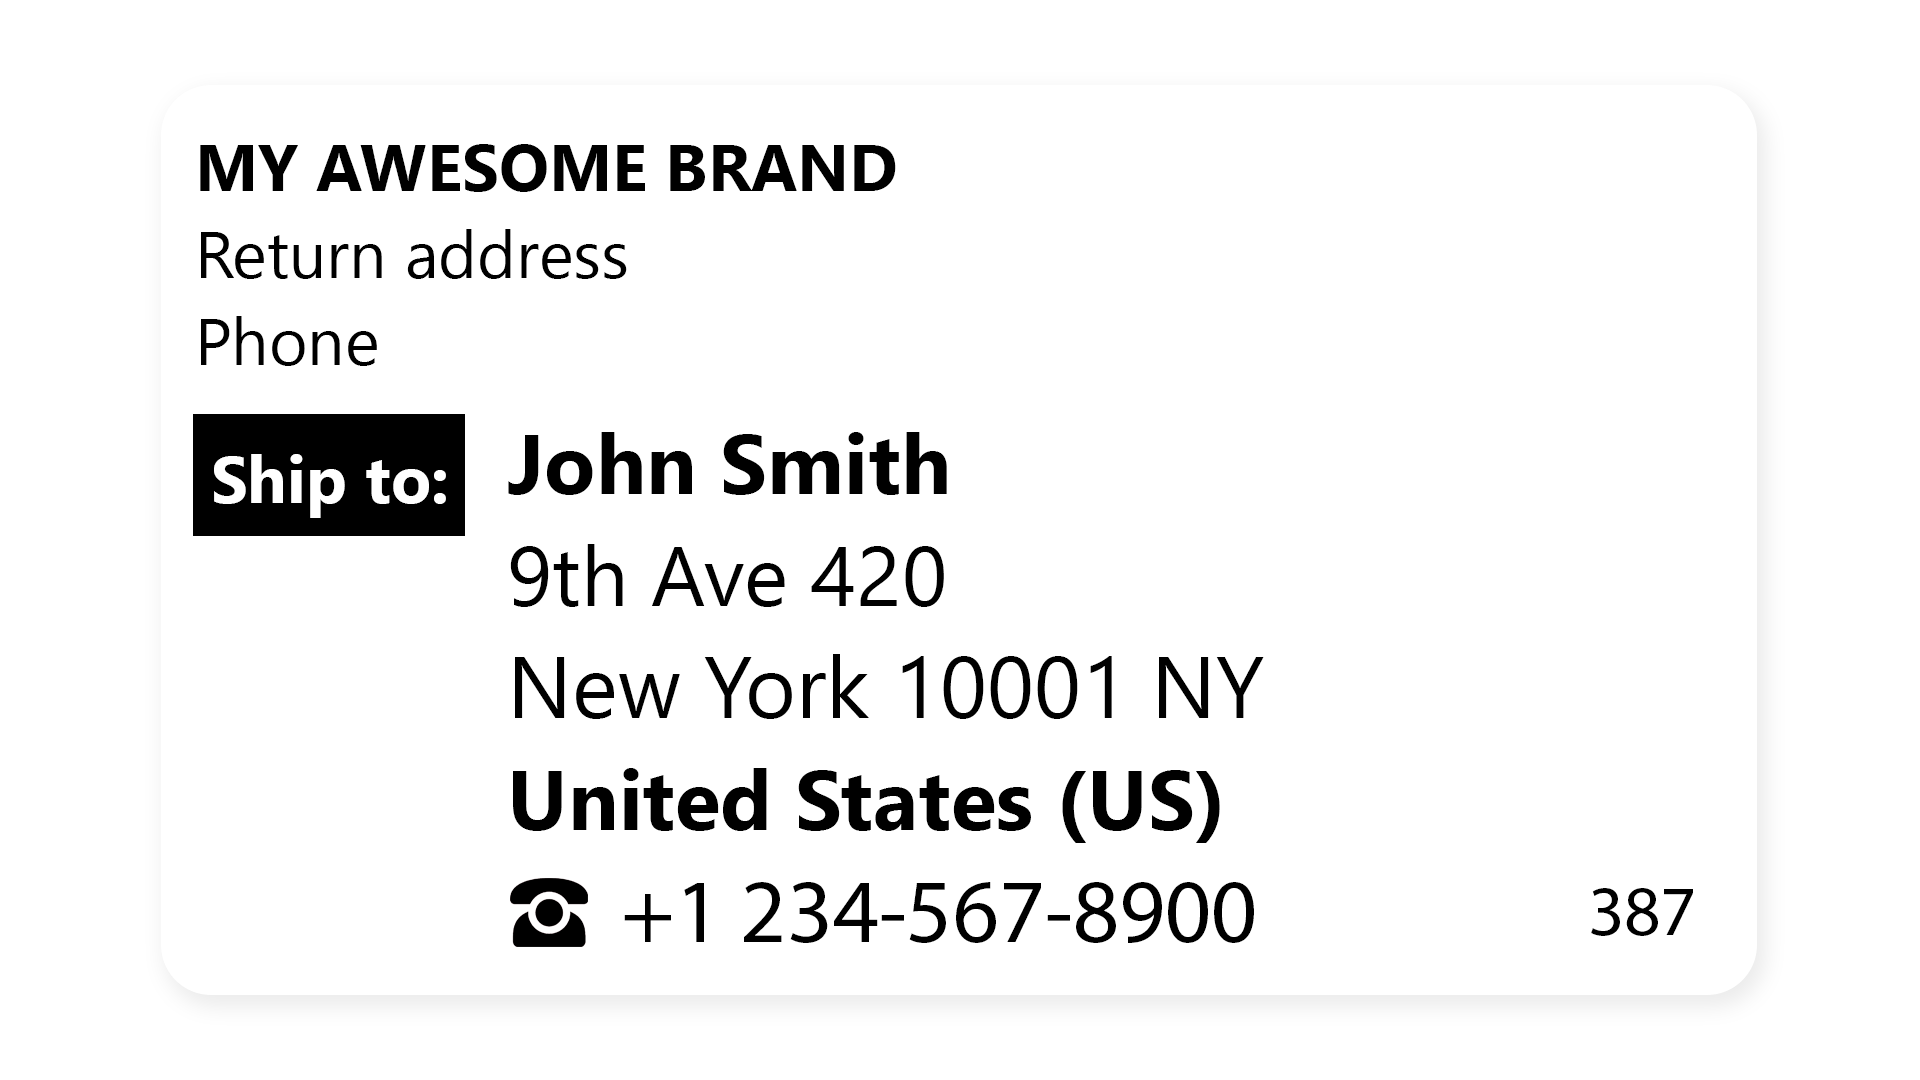
With basic HTML/CSS skills – label styling is in your hands!
For example, adding a Ship to: in front (or over) the destination address, by simply introducing another div element right in the sender section content editor, with absolute positioning via custom CSS.
Note: the values in this example are based on the plugin default label size and settings.
1. Set sender Section height to 18mm.
2. Add a div with the desired content to the sender editor (as code in the Text tab of the editor):
<div class="ship-to">Ship to:</div>
3. Set the custom CSS to:
					.shipping-label { align-items: flex-end; }
.recipient-container { width: 78mm; }
.detail-container { justify-content: initial; }
.name, .country { font-weight: bold; }
.ship-to { position: absolute; top: 21mm; padding: 1mm; background-color: black; color: white; font-weight: bold; }
and voilà, we clearly see the destination address.